Brampton DriveTest Centre Overview & Quick Facts:
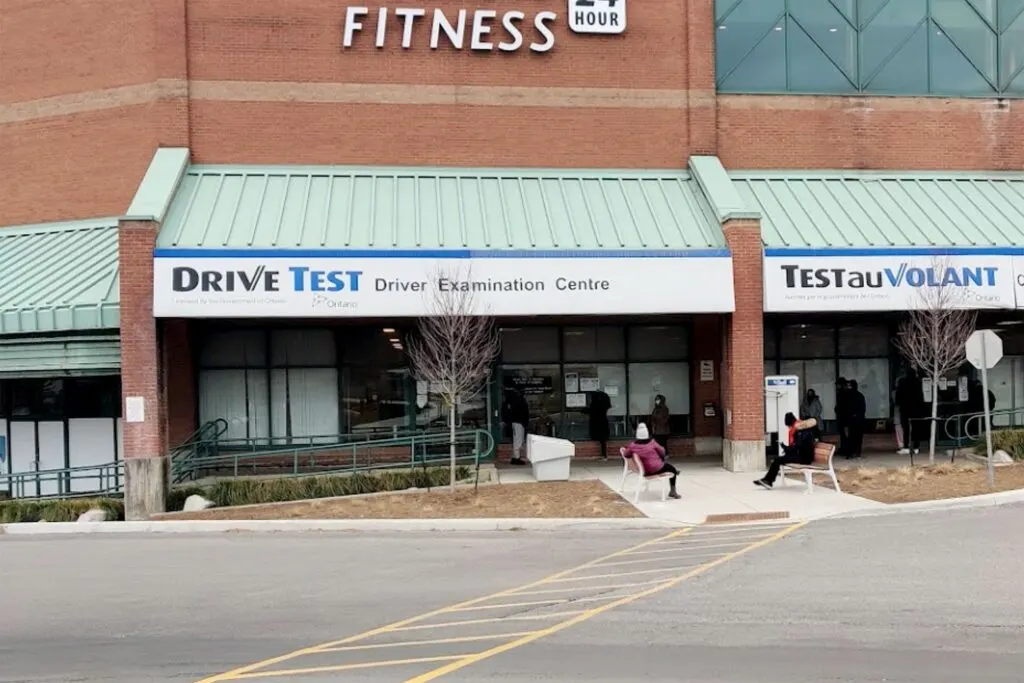
- Address: 499 Main St S, Brampton, ON L6Y 1N7
- Tests Administered: G1 knowledge tests, G2 road tests (G1 exit), Full G highway road tests (G2 exit)
- Primary Evaluation Corridors: Main Street South, Steeles Avenue East, Highway 410, Charolais Blvd
- High-Impact Examiner Focus: Assertive 100 km/h Highway 410 merging, strict speed control, and 360-degree shoulder scanning.
- Preparation Resources: Practice test routes with local Brampton driving instructors or book a test-ready car with our Brampton road test package ($170–$220).
The Brampton DriveTest Centre at 499 Main Street South is one of the busiest and most scrutinized driver examination centres in Canada. With thousands of student drivers, working professionals, and newcomers attempting their G2 and full G road tests here each month, test-day anxiety runs high.
Brampton has developed an intimidating reputation among learner drivers due to its high traffic volume, multi-lane suburban arterials, and rapid commercial growth. However, examiners do not evaluate you on luck. Every test follows standardized Ontario Ministry of Transportation (MTO) scoring rubrics along predictable local routes.
Whether you are attempting your G2 road test or preparing for your full G highway evaluation, this in-depth guide breaks down the official Brampton DriveTest routes, key intersections, the 5 most common automatic failure traps, and proven strategies to pass on your first try.
Brampton G2 Road Test Route Breakdown (Step-by-Step)
The G2 road test (G1 exit exam) evaluates basic vehicle control, residential maneuvers, right-of-way rules, and intersection safety. It typically lasts 15 to 20 minutes and does not involve 400-series highway driving.
Phase 1: Exiting the Commercial Plaza
Your test begins the second you turn your key in the parking stall. Exiting the plaza onto the public roadway is where many candidates pick up immediate deductions:
- Reverse Scanning: If you reverse out of your parking space, look over your right shoulder and scan 360 degrees. Do not rely exclusively on backup cameras.
- The Plaza Stop Line: As you navigate through the plaza towards the exit, treat every pedestrian crossover and painted stop line with absolute seriousness. Rolling through a plaza stop sign is an immediate failure.
- Turning onto the Main Arterial: Signal early, stop completely behind the pedestrian sidewalk line, verify both directions are clear of sidewalk traffic, creep forward to check vehicle traffic, and execute a smooth turn into the nearest lane.
Phase 2: Navigating Main St S & Arterial Corridors
From Main Street South, examiners frequently guide candidates toward nearby residential subdivisions:
- Speed Limit Vigilance: Pay strict attention to posted speed limits and watch for flashing amber lights and Community Safety Zones near local schools. Exceeding posted limits in an active school zone will result in an instant failure.
- Lane Positioning: Maintain a consistent central lane position and leave at least 1 meter of clearance when passing parked cars.
Phase 3: Residential Maneuvers (Parallel Park, 3-Point Turn & Hill Stop)
Examiners turn into quiet residential subdivisions to conduct required maneuvers:
- Parallel Parking: Usually performed behind a single parked passenger car. Signal right, pull alongside the target vehicle (approx. 1 meter away), check mirrors and right blind spot, reverse at a 45-degree angle until your front bumper clears their rear bumper, turn the wheel full lock to the left, and settle within 30 cm (1 foot) of the curb. Tapping the curb lightly with the tire rubber is a minor error; mounting or climbing the curb is an automatic fail.
- Three-Point Turn: Signal right to pull to the curb. Signal left, conduct a complete 360-degree check, turn sharply to the opposite curb. Shift to reverse, check both directions, reverse across the street. Shift to drive, signal, and proceed in the new direction. Never dry-steer (turning wheels while stationary).
- Roadside Emergency Stop: Signal right, pull smoothly to the curb, cancel signal, activate 4-way hazard flashers, and engage the parking brake. When instructed to resume, turn off hazards, shift to drive, disengage parking brake, signal left, check mirrors and shoulder blind spot, and merge safely.
- Uphill/Downhill Parking: If parked facing uphill with a curb, turn wheels sharply to the LEFT. In all other scenarios (uphill without curb, downhill with or without curb), turn wheels sharply to the RIGHT. Always set the parking brake.
Phase 4: Returning via Arterial Corridors
The return leg brings you back toward the centre. Multi-lane arterials require decisive gap selection—hesitating at a green light or pulling out in front of heavy traffic will result in points deducted for lack of confidence or obstructing traffic.
Brampton Full G Road Test Route Breakdown (Highway 410)
The full G road test (G2 exit exam) evaluates advanced defensive driving, high-speed expressway merging, independent lane changes, and hazard perception. It takes approximately 25 to 30 minutes.
Phase 1: Commercial Corridor to Highway 410
Examiners typically direct you toward the Highway 410 interchange:
- Traffic Flow: Keep pace with posted speed limits. Stay in the driving lane (middle or right lane) until instructed to change lanes for the highway on-ramp.
- Navigating the On-Ramp: The on-ramp looping onto Highway 410 has an advisory yellow curve speed. Maintain safe control through the curve, but the moment the ramp straightens out into the acceleration lane, accelerate assertively.
Phase 2: Highway 410 Merging at 100 km/h
This is the single most critical scoring item on the Brampton G test:
- Target Speed: You must accelerate to 100 km/h while still on the on-ramp acceleration lane.
- The Common Brampton Fail: Merging into live Highway 410 traffic at 75–85 km/h forces highway traffic to brake or change lanes to avoid you. Examiners categorize this as creating a traffic hazard, which results in an immediate fail.
- Signal & Blind Spot: Activate your left turn signal early, check your rearview mirror, side mirror, and conduct an unmistakable shoulder blind-spot check before crossing the broken white line.
Phase 3: Highway 410 Lane Changes
Once settled into highway flow at 100 km/h, the examiner will prompt you:
- "When it is safe, change one lane to the left, and then return to the right lane."
- Execute each lane change sequentially:
- Check rearview and left side mirrors.
- Activate left turn signal (let it flash at least 3 times before moving).
- Perform a deliberate shoulder blind-spot check.
- Glide smoothly into the lane over 3 to 4 seconds—do not jerk the steering wheel.
- Cancel signal, establish your 3-second space cushion, and wait for instructions before returning right.
- Repeat the same mirror-signal-blindspot routine when returning to the right lane.
Phase 4: Exiting & Re-Entering
Examiners exit Highway 410 and have you re-enter in the opposite direction:
- Deceleration Lane Discipline: Do NOT brake while still in the main highway travel lane. Signal, enter the designated deceleration off-ramp, and only then brake smoothly down to the ramp advisory speed.
- Interchange Overpass & Re-entry: You will navigate the cross-street, loop onto the opposite Highway 410 on-ramp, execute a second 100 km/h merge, perform another set of highway lane changes, and exit to return to the centre.
Top 5 Automatic Fail Traps at Brampton DriveTest
Every year, hundreds of capable drivers fail at Brampton not because they lack skill, but because they trigger an automatic disqualification. Keep these five traps front of mind:
1. The "Rolling Stop" at Commercial Plaza Exits
When exiting the plaza onto the road, you cross a pedestrian sidewalk. You must bring the vehicle to a 100% complete, motionless stop behind the sidewalk line. If your vehicle rolls forward even at 2 km/h while you look for oncoming traffic, the examiner will mark an immediate failure for failing to stop.
2. Merging onto Highway 410 Below Highway Speed
Entering Highway 410 at 80 km/h because you are nervous is considered a critical safety hazard. Press the accelerator firmly along the straight section of the on-ramp so your speedometer reads 100 km/h before your tires touch the highway travel lane.
3. Turning Left on Amber across Multi-Lane Arterials
Brampton arterials are wide, and oncoming traffic travels fast. If you are waiting in the intersection to turn left and the light turns amber, do not rush if oncoming traffic has not stopped. Conversely, if you enter the intersection on a late amber when you could have stopped safely, it is scored as an amber light violation.
4. Missing Community Safety Zones and School Zones
Brampton has implemented strict photo radar and 40 km/h Community Safety Zones in suburban neighborhoods. Exceeding posted limits in an active school zone will result in an immediate test termination.
5. Only Moving Your Eyes Instead of Your Head
DriveTest examiners evaluate your observation habits from the passenger seat. If you glance at your mirrors using only your eye pupils, the examiner cannot see your movement and will deduct points for failing to scan. Wear a baseball cap or move your chin deliberately toward each mirror every 5 to 8 seconds.
Check-in & Test-Day Logistics at 499 Main St S
Knowing what to expect on arrival eliminates unnecessary anxiety on test day:
- Arrive 30 Minutes Early: Traffic along Brampton arterials can be unpredictable. Arriving early gives you time to settle your nerves and complete check-in.
- Back into Your Parking Space: Park in one of the designated DriveTest applicant stalls. Reverse-park into the stall before your test so that when the examiner gets into the car, you can pull straight forward without needing to execute a stressful reverse maneuver out of a crowded lot.
- Self-Serve Kiosk Check-in: Enter the centre lobby and check in at the automated touch-screen kiosk. You will need your:
- Ontario driver's licence number
- Vehicle licence plate number
- Vehicle make, model, and colour
- Exact parking stall number where your car is parked
- Wait in Your Car: After checking in, return to your car, fasten your seatbelt, and keep your driver's window down. The examiner will walk up to your car, verify your identity, inspect your vehicle, and begin the test.
Vehicle Safety Inspection Checklist (Don't Get Disqualified at the Curb!)
Before the examiner enters your vehicle, they will conduct a mandatory physical safety inspection. If your car fails any item, your test is cancelled immediately and your fee is forfeited:
- Working Brake Lights: All three brake lights (left, right, and center third brake light) must illuminate brightly.
- Working Turn Signals: Front and rear turn signals must flash properly without rapid clicking (indicating a blown bulb).
- Horn Operational: The horn must sound loud and clear.
- Windshield Integrity: No spider-web cracks or damage in the driver's direct field of view or active wiper path.
- Tires Roadworthy: Adequate tread depth with no visible bulges or exposed cords.
- Doors & Windows Functional: Driver and passenger doors must open and close from inside and outside.
- Dashboard Warning Lights: No critical brake system warning lights or check-engine warnings that indicate vehicle instability.
- Valid Documentation: Original vehicle ownership permit and valid pink motor vehicle liability insurance card.